
Setup with MultiMC
MultiMC is an open source Minecraft launcher with additional functionalities compared to the vanilla launcher
We suggest checking out the official Website
The main differences is that you can create multiple “instances” or minecraft, each with their own .minecraft/ folder. This means each instance can have a completely different minecraft installation, be it a different version, forge, fabric, different mods as opposed to only one mods folder in the vanilla launcher.
Prerequisites
A downside is, that MultiMC doesn’t include java like the vanilla launcher. This means you have to install java yourself!.
If you plan on using 1.8-1.12.2 and 1.14+ versions you also need to install multiple java versions. A full guide can be found here
Downloading and installing MultiMC
- Download MultiMC from MultiMC.org
- Extract the zip to a folder of your choice
- In the extracted folder you’ll find a “MultiMC.exe”, run that
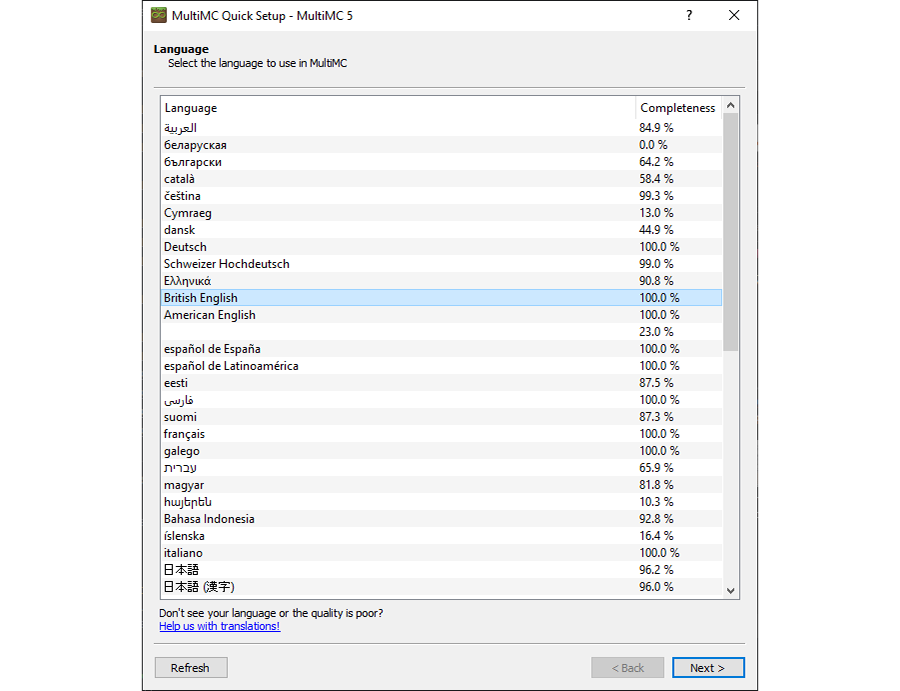
- Select your language
- Next, select the java installation. If you have nothing here, check Setting up Java

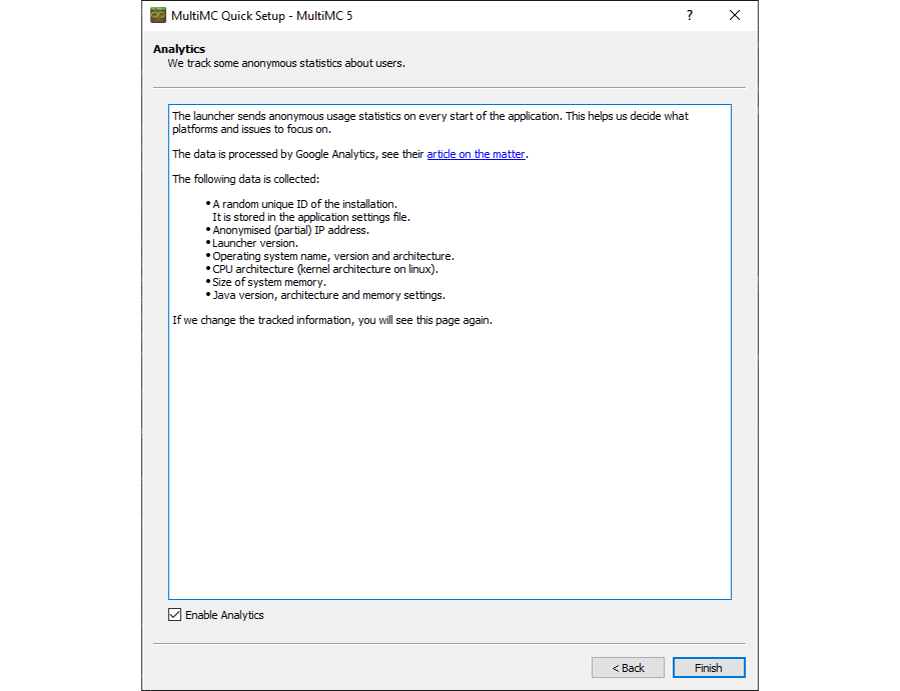
- At the bottom you can allocate more memory to Minecraft. 2 GB is usually enough, 4 GB for extreme uses (Playing modpacks).
- Accept or deny the analytics and click “Finish”
Adding your Minecraft Account
This requires you to know your Microsoft Account Details.
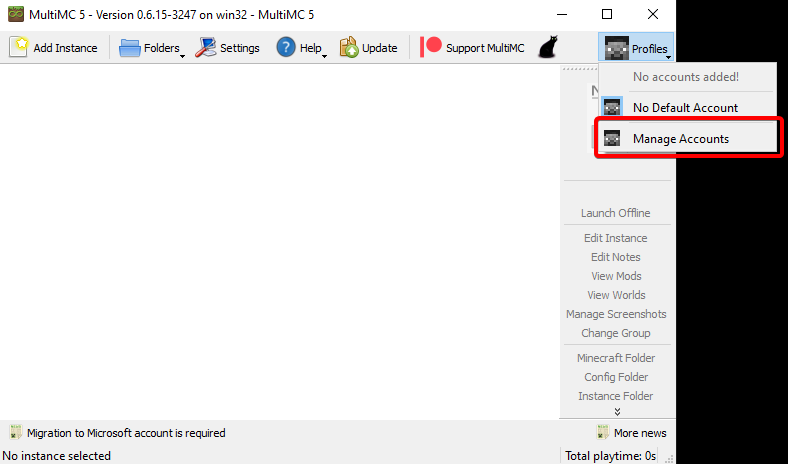
- Click on Profiles > Manage Accounts
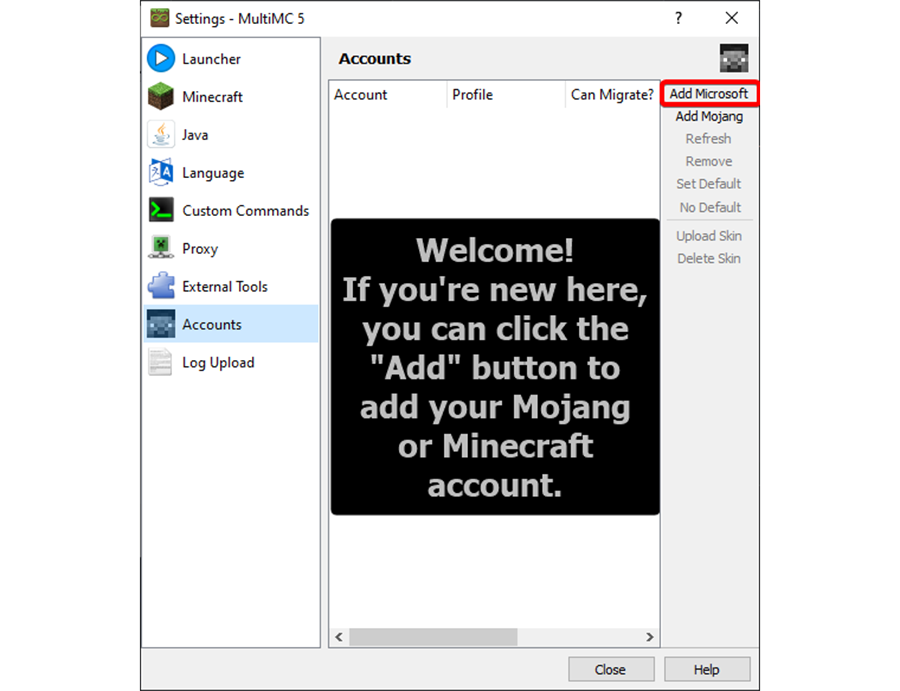
- Click on “Add Microsoft”
- Follow the instructions and enter the code you see in the pop-up
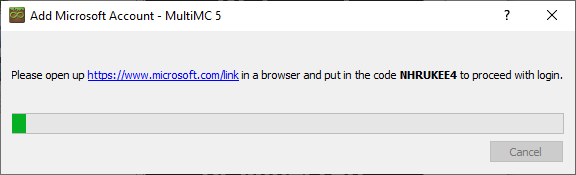
- Log in with your Microsoft account
- Your account should’ve been added to the list. You can also add more than one account.
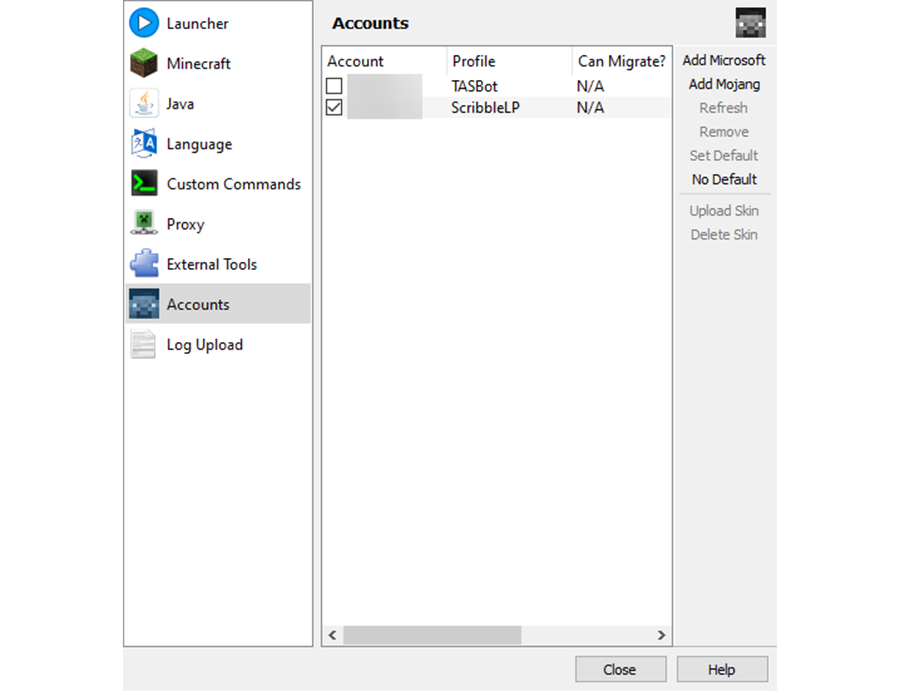
- When closing the settings you should see your skin appear in the top right. If you added multiple accounts you can switch between them by clicking on the top right

Adding an instance
- Click on “Add instance” in the top left
- Here you can select the minecraft version, or choose a modpack from other mod launchers. You can also write a cool name for your instance and/or add your instance to a group
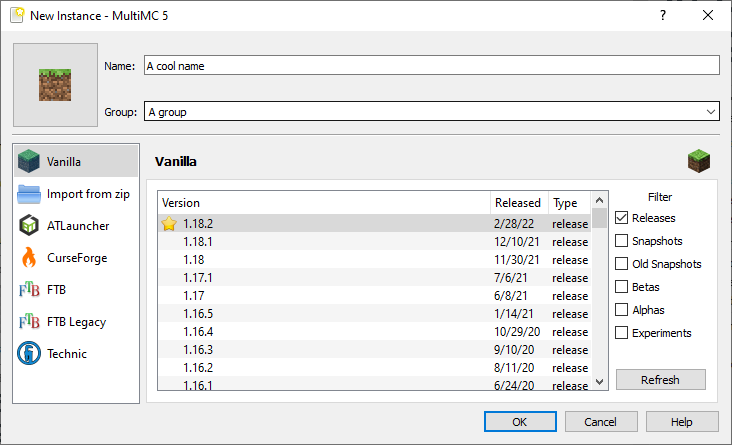
- You can also choose an icon for your instance
- To start your instance, doubleclick or click “launch” on the right
Installing Fabric
Scroll down for forge installation.
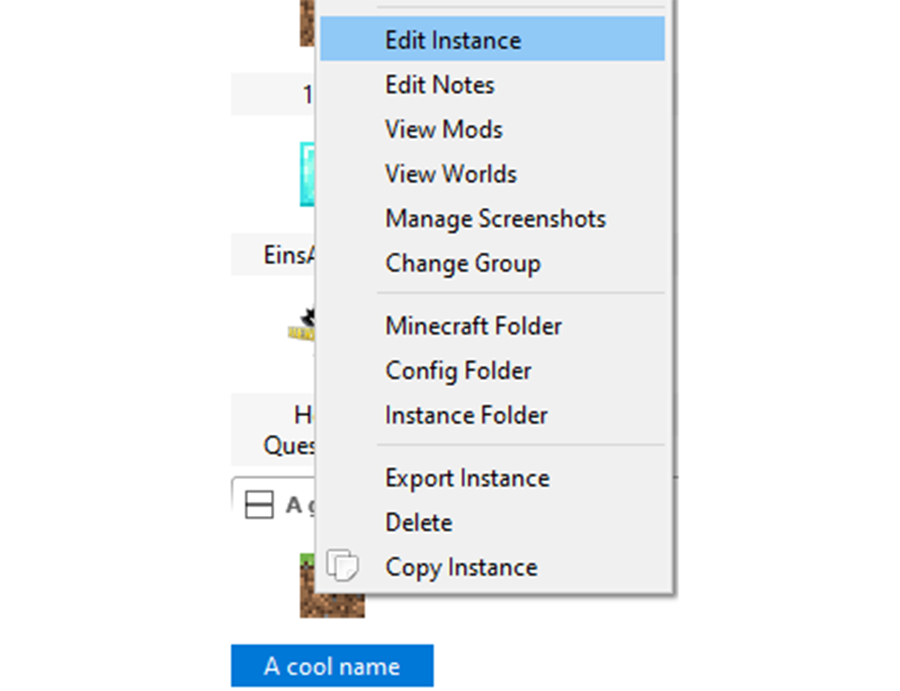
- Rightclick your instance and click “Edit instance” (You can also click Edit instance in the right panel)
- Click “Install Fabric”
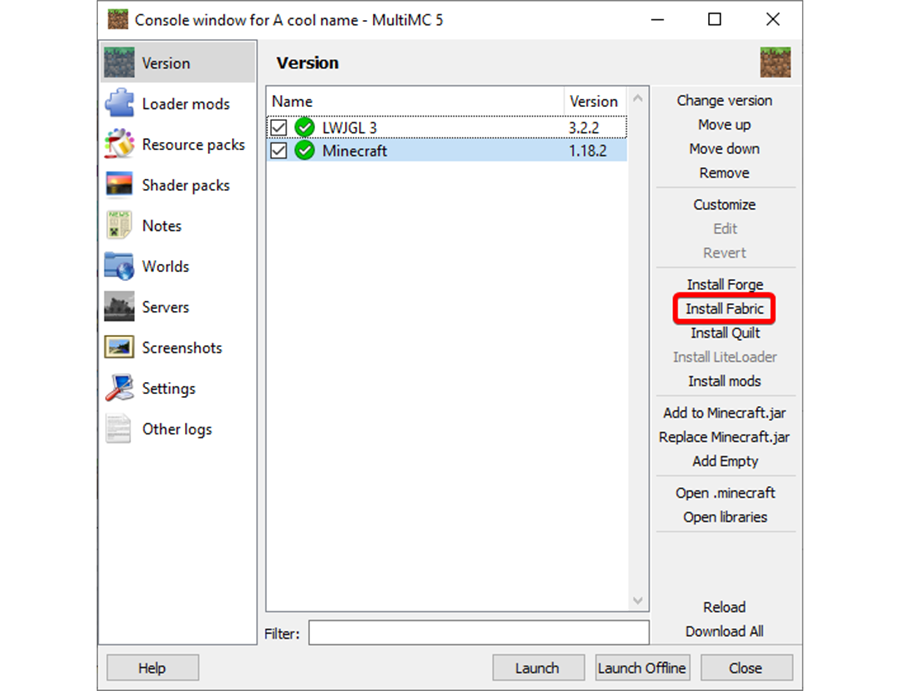
- Select a fabric mod loader version.
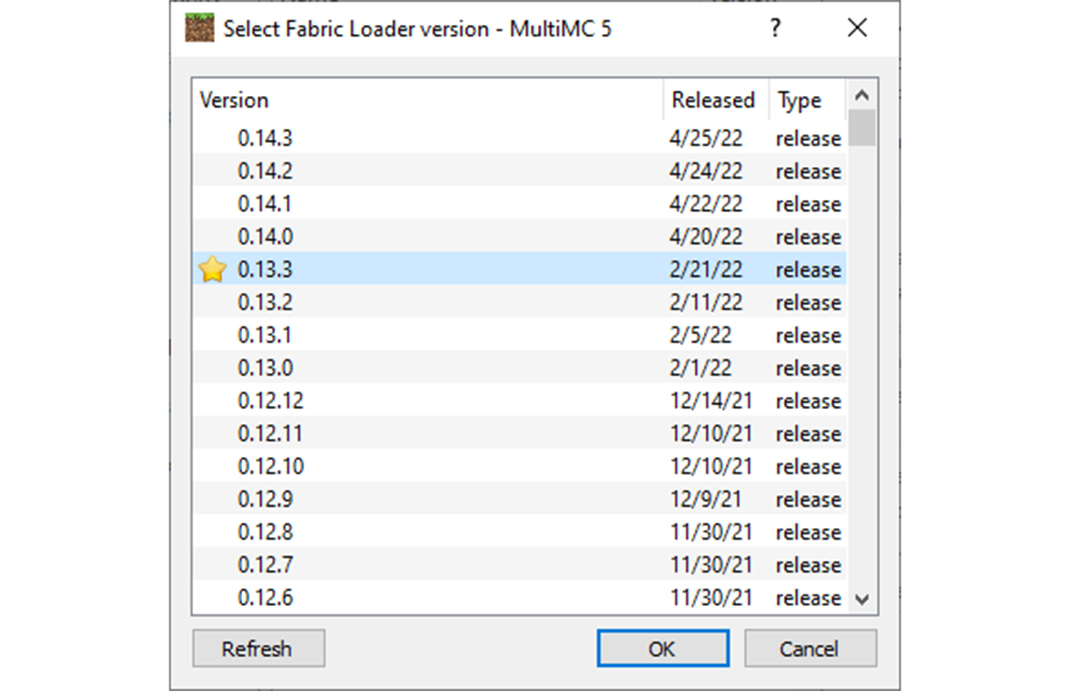
- Click ok. Fabric should automatically download and install
Installing Forge
Scroll up for fabric installation.
- Rightclick your instance and click “Edit instance” (You can also click Edit instance in the right panel)
- Click “Install Forge”
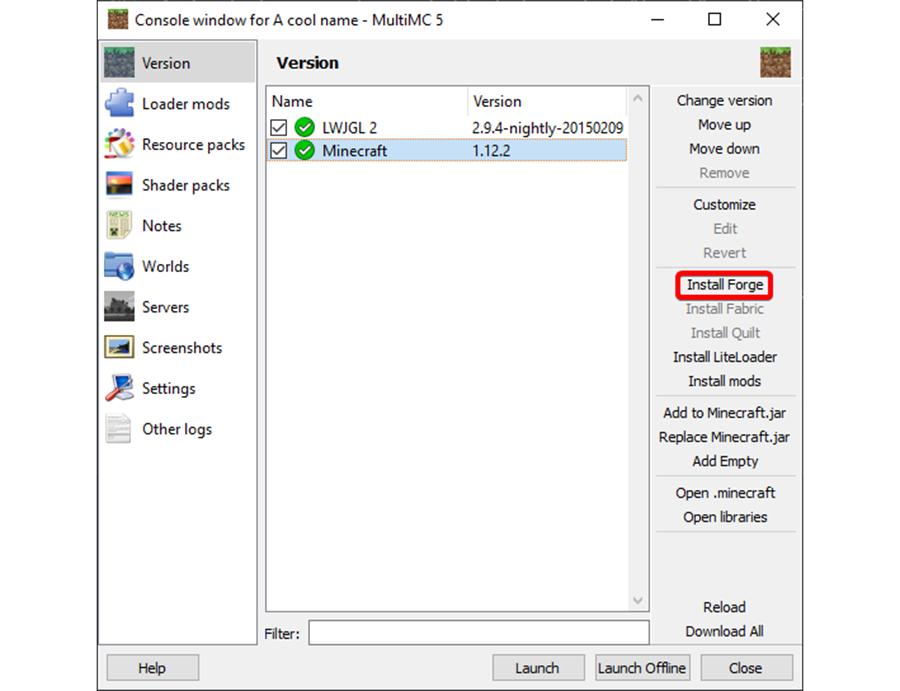
- Select a forge mod loader version. The one with the star is usually the best.
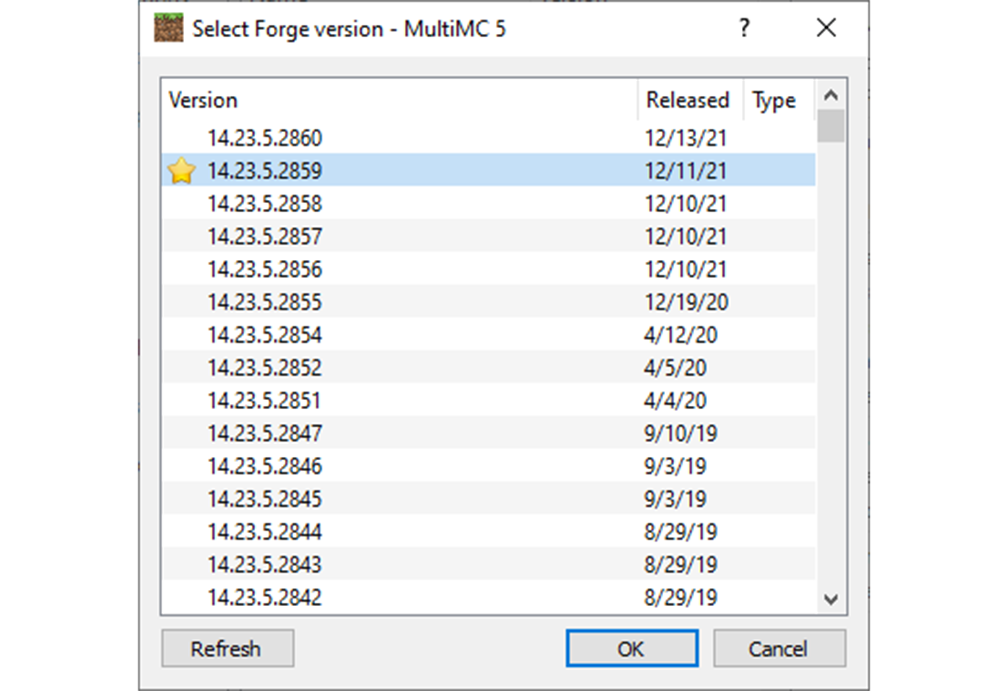
- Click ok. Fabric should automatically download and install.
Adding mods
- This process is the same for forge and fabric mods. BUT: You can’t mix forge and fabric mods together.
- All mods have to match the Minecraft version you want to play in, unless the mod author says something different. Mods for 1.11 don’t work on 1.12!
- Rightclick your instance and click “Edit instance” (You can also click Edit instance in the right panel)
- Select “Loader Mods” on the left
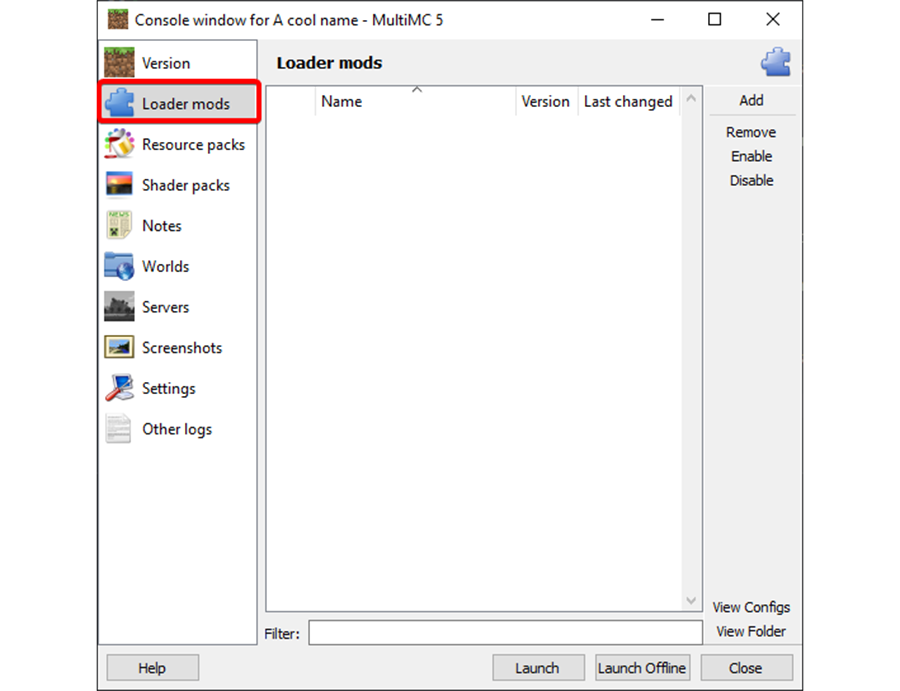
- Add your mods to this instance by
- Clicking “Add” in the top right or
- Dragging and dropping files into the window
- You can disable mods by unticking the checkbox next to the mod